HOME > Resource Center > Biofuel Densification Topics > From Logs to Pellets: Demystifying Wood Pellet Production
If you have great interests in making wood pellets, then keep reading this article for a good start. All you need to have and start making your own wood pellets is covered.
 Most pellets are made in large amounts by pellet mills using various organic materials such as corn husks, farm waste, and wood among others. However, we will take you mainly through steps for making pellets using wood. Keep at the back of your mind that these steps apply principally to other organic materials used in pellet making as well.
You make wood pellet by first reducing the raw material into smaller units and then squeezing them into dense pellets using a die, a funnel shaped pellet compressor. The shape of the die is essentially effective, the material gets into a dense pellet as it is pressed deeper. This is because of the reduction in diameter towards the inner of the die.
The frictional force resulting from this procedure generates a substantial heat to melt down lignin, which is a compound found naturally in wood and many other fibrous materials. On coming out of the pellet mill die, the dense pellet is left to cool. This causes the cooling lignin to stick the material firmly together, thus making a solid and tough pellet.
As mentioned earlier, industrial pellet plants have been a major production of large quantities of pellets. However, in the recent past, things have been changing gradually. Domestic production of pellets by individuals is becoming rampant, small scale businesses are taking the step too (see small pellet line). You could be one of those people who would like to make their own wood pellets. The steps below are therefore, for no one else but you.

1. Reducing the size of the material.
Collect the wood material to be used and reduce it to smaller sizes as possible without turning it into sawdust. You achieve this by shredding the materials until it is no larger than an inch (Necessary equipment: wood chipper, hammer mill). This is done to make sure it fits into the die. If the materials used are less than an inch or simply sawdust, this step would not be necessary and is therefore skipped.
2. Transporting the raw material.
After reducing the wood raw material, it is necessary to transport it to the dryer. This can be done using conveyor belts or the most commonly used screw augers.
Heat the material to dry up. The recommended content moisture is 10-20%. The material won’t yield best results if it dries completely hence needs to keep the moisture in the right proportions. (Necesary equipment: dryer) Note: drying by heat is more costly and therefore burning pellets to produce the heat cuts on cost.
4. Batch mixing
To produce quality and reliable pellets, it is vital to have uniformity in all aspects of the batch of material. Already consistent material in terms of moisture and density is skipped for the next step, otherwise it is fed through a batch mixer to achieve consistency.
5. Conditioning the material.
Just like in the above step, some materials might have all the right properties while others are deficient. This is specifically when it comes to lignin compound, though abundant in most materials, others may need backup agents like cooking fat to help stick together firmly. Furthermore, moisture content can be added if the material gets heated below proper moisture content.
Other materials that take more heat might require heating in advance to achieve consistent outcomes.
6. Producing the pellet.
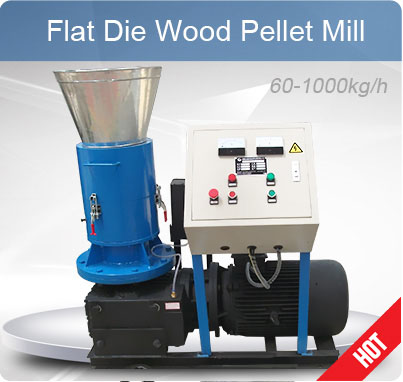
For smaller batches, pellet compression involving a die and a roller is considered. A die is a metal containing holes through it. A roller presses the material on the die through the holes into units the size of completed pellets. The pellets presses can either be flat or round die.
7. Sieving the pellet.
Sieve the pellets that came out without forming properly. Some pieces may fall apart while pressing. Isolate the improper pieces depending on your desired quality. This is done by shaking or sifting through a screen.
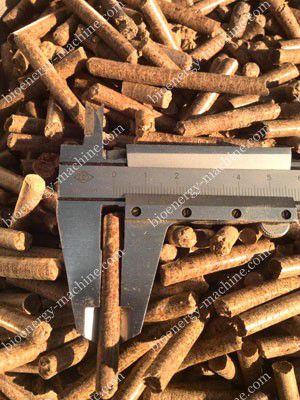
8. Cooling the pellet.
When the pellet is coming out of the die, it is hot and moist. It needs to cool and dry. Spreading them out to cool is preferred since it allows for natural cooling. You can also choose a pellet cooler to save your time and labor.
9. Transporting the pellet.
Here, the pellets are transported for bagging and storage using bucket elevators.
10. Bagging and storage.
This is the last step done for finished pellets. It could be stored for using right away or for transporting to consumers. Store in a dry place away from moisture, mostly in sealed plastic bags.
Most pellets are made in large amounts by pellet mills using various organic materials such as corn husks, farm waste, and wood among others. However, we will take you mainly through steps for making pellets using wood. Keep at the back of your mind that these steps apply principally to other organic materials used in pellet making as well.You make wood pellet by first reducing the raw material into smaller units and then squeezing them into dense pellets using a die, a funnel shaped pellet compressor. The shape of the die is essentially effective, the material gets into a dense pellet as it is pressed deeper. This is because of the reduction in diameter towards the inner of the die.
The frictional force resulting from this procedure generates a substantial heat to melt down lignin, which is a compound found naturally in wood and many other fibrous materials. On coming out of the pellet mill die, the dense pellet is left to cool. This causes the cooling lignin to stick the material firmly together, thus making a solid and tough pellet.
As mentioned earlier, industrial pellet plants have been a major production of large quantities of pellets. However, in the recent past, things have been changing gradually. Domestic production of pellets by individuals is becoming rampant, small scale businesses are taking the step too (see small pellet line). You could be one of those people who would like to make their own wood pellets. The steps below are therefore, for no one else but you.
Steps for making wood pellets
- Reducing the size of the material.
- Transporting the raw material.
- Drying the material.
- Batch mixing.
- Conditioning the material.
- Producing the pellet.
- Sieving the pellet.
- Cooling the pellet.
- Transporting the pellet.
- Bagging and storage.
1. Reducing the size of the material.
Collect the wood material to be used and reduce it to smaller sizes as possible without turning it into sawdust. You achieve this by shredding the materials until it is no larger than an inch (Necessary equipment: wood chipper, hammer mill). This is done to make sure it fits into the die. If the materials used are less than an inch or simply sawdust, this step would not be necessary and is therefore skipped.
2. Transporting the raw material.
After reducing the wood raw material, it is necessary to transport it to the dryer. This can be done using conveyor belts or the most commonly used screw augers.
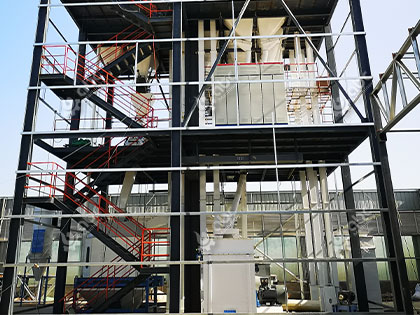
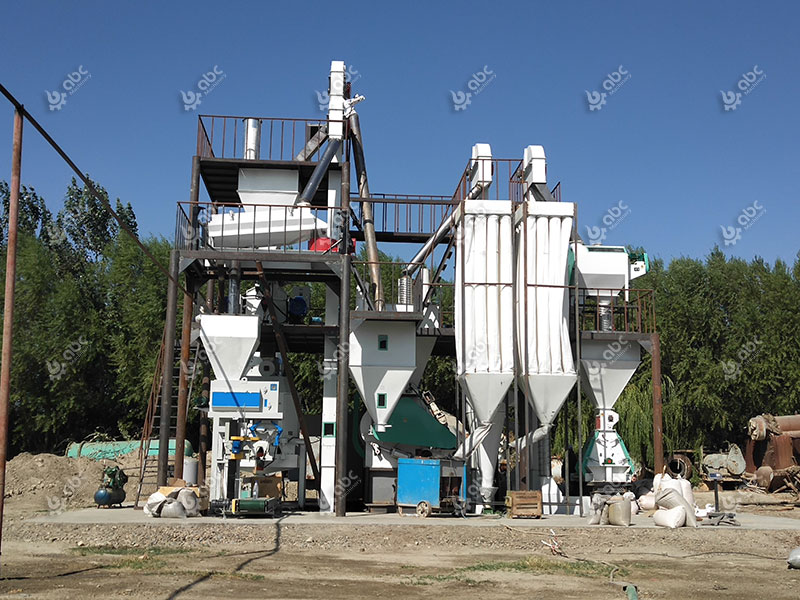
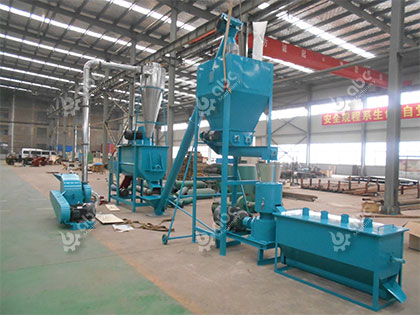
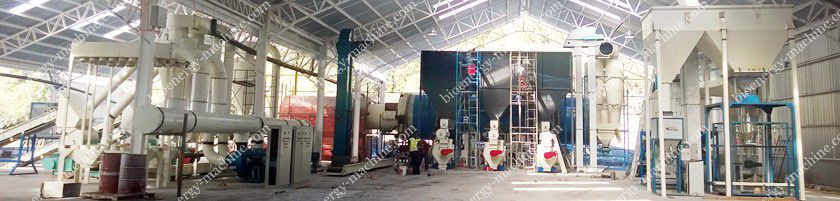
A typical wood pellet mill plant
3. Drying the material.Heat the material to dry up. The recommended content moisture is 10-20%. The material won’t yield best results if it dries completely hence needs to keep the moisture in the right proportions. (Necesary equipment: dryer) Note: drying by heat is more costly and therefore burning pellets to produce the heat cuts on cost.
4. Batch mixing
To produce quality and reliable pellets, it is vital to have uniformity in all aspects of the batch of material. Already consistent material in terms of moisture and density is skipped for the next step, otherwise it is fed through a batch mixer to achieve consistency.
5. Conditioning the material.
Just like in the above step, some materials might have all the right properties while others are deficient. This is specifically when it comes to lignin compound, though abundant in most materials, others may need backup agents like cooking fat to help stick together firmly. Furthermore, moisture content can be added if the material gets heated below proper moisture content.
Other materials that take more heat might require heating in advance to achieve consistent outcomes.
6. Producing the pellet.
For smaller batches, pellet compression involving a die and a roller is considered. A die is a metal containing holes through it. A roller presses the material on the die through the holes into units the size of completed pellets. The pellets presses can either be flat or round die.
7. Sieving the pellet.
Sieve the pellets that came out without forming properly. Some pieces may fall apart while pressing. Isolate the improper pieces depending on your desired quality. This is done by shaking or sifting through a screen.
8. Cooling the pellet.
When the pellet is coming out of the die, it is hot and moist. It needs to cool and dry. Spreading them out to cool is preferred since it allows for natural cooling. You can also choose a pellet cooler to save your time and labor.
9. Transporting the pellet.
Here, the pellets are transported for bagging and storage using bucket elevators.
10. Bagging and storage.
This is the last step done for finished pellets. It could be stored for using right away or for transporting to consumers. Store in a dry place away from moisture, mostly in sealed plastic bags.
Products
Hot Sale
 Projects
Recent News
Projects
Recent News
Featured Columns
Discovering Pellet Materials Varieties & Applications
Step-by-Step Guide for Making Your Own Wood Pellets
Streamlining Wood Pellet Mills Selection
Boosting Animal Feed Production Business
Tailor-made Animal Feed for Various Species
Secrets to Perfecting Feed Production Machine
Top Picks
Make Your Own Sugarcane Bagasse Pellets
Make Your Own Straw Pellets
Make Olive Pomace Into Pellets Or Briquettes Fuel
Feed Pellet Mill
Making Chicken Feed Pellets
Making Fish Feed Extruding Pellets
Featured Posts
Projects